
Lawn
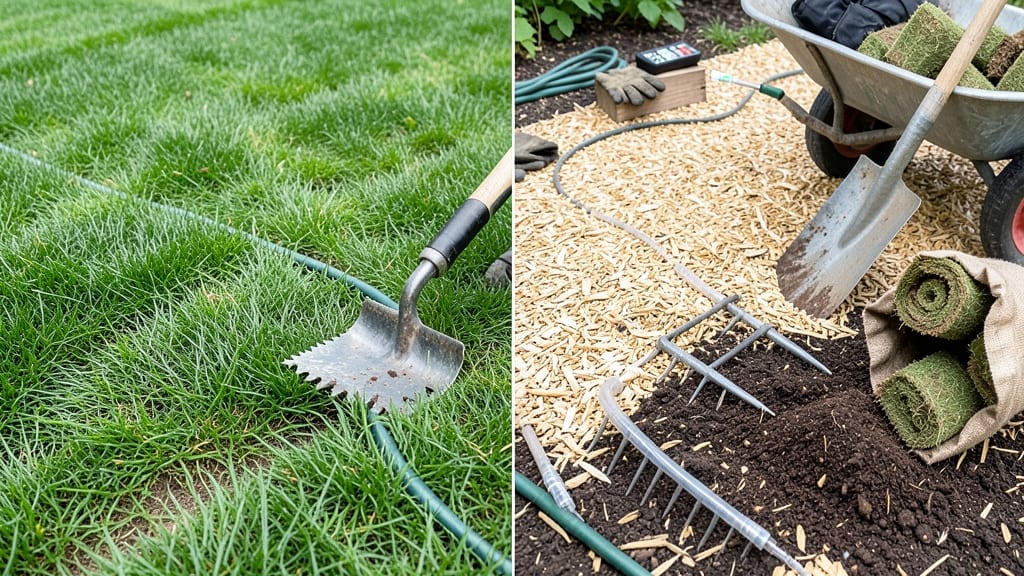
Remove the lawn for a garden—it’s the first step to a yard that thrives without the mowing, watering, and chemical battles. 🌱 I’ve torn out three lawns myself, and each time, the transformation from dull green carpet to a living, breathing garden has been shockingly rewarding. The key? Starting with the right soil prep and plant choices that fit your space and sunlight.
The process feels daunting until you break it down: smother the grass first, then till or sheet mulch, and finally plant perennials or ground covers that spread effortlessly.
You’ll need basic tools—a sharp spade, compost, and mulch—but the real investment is time (about a weekend) and patience (the first year is the hardest). The payoff? A yard that looks lush all season with almost no upkeep.
Imagine stepping onto soft, springy ground instead of hard-packed dirt, where bees hum over native wildflowers and herbs grow just inches from your door. My first lawn-to-garden project now produces more food and beauty than the old lawn ever did—plus, I’ve cut my water bill in half.
The best part? You can adapt this for any yard size, from a tiny urban patch to a half-acre.
Fair warning: weeds will test your resolve, and drainage might surprise you. But once established, these gardens outperform lawns in every way—except maybe for the occasional game of frisbee. Let’s get that sod out and turn your yard into something that actually works for you.
📚 In This Guide
- What you need
- Instructions
- Tips and common mistakes
- Wrapping up and next steps
What you need
- ● Safety gear: Work gloves (heavy-duty, waterproof) – 1 pair
- ● Safety goggles – 1 pair
- ○ Knee pads – 1 pair (optional but highly recommended!)
- ● Lawn removal tools: Shovel (flat-head or spade) – 1
- ● Garden fork (for stubborn roots) – 1
- ● Lawn edging tool (for clean borders) – 1
- ● String trimmer (weed whacker) – 1 (rent or borrow if needed)
- ● Heavy-duty tarp or plastic sheeting (10–15 mil thickness) – Enough to cover the lawn area + extra for overlap
- ● Stakes and twine (for marking) – 5–10 stakes
- ● Soil prep supplies: Compost or well-aged manure – 2–3 cubic yards (depending on garden size)
- ● Garden soil or topsoil – 1–2 cubic yards
- ● Garden hose with nozzle (for watering) – 1
- ● Lawn smothering fabric (landscape fabric) – For easier removal of grass
- ● Post-hole digger – If planting perennials or shrubs
- ● Wheelbarrow – For hauling debris and soil
- ● Broadcast spreader – For even compost distribution
- ● Mulch (wood chips, straw, or pine needles) – For weed suppression
- ● Native plants or drought-resistant seeds – For your new garden!
Step-by-Step instructions for removing lawn to create a low-maintenance garden
Here's how to permanently replace grass with a thriving, easy-care garden that saves time and water.
🪴 Step 1: Plan Your Garden Layout and Mark the Area
Sketch your garden design on paper first. I like to include paths for easy access and group plants with similar water needs together. Use a garden hose or spray paint to mark the exact area where the lawn will come out—this prevents accidental mowing or trimming later.
Measure your space carefully. A 4-foot wide path between planting beds gives enough room to reach all plants without compacting soil. For a low-maintenance design, include 30% mulched ground cover to reduce weeds and retain moisture.
✂️ Step 2: Remove the Existing Grass Completely
Start by mowing the marked area as short as possible—this makes removal easier. Then, use a sod cutter or sharp spade to lift the entire sod layer. I dig in 2-inch chunks to avoid tearing my back, working in small sections. Remove all grass, roots, and thatch—any remaining roots will regrow and compete with your new plants.
If sod cutting isn't an option, smother the area with 6-12 sheets of thick cardboard or newspaper (no glossy ink) for 4-6 weeks
Turn the exposed soil with a broadfork or shovel to loosen it 8-12 inches deep. Break up any compacted layers—this is where roots will grow, so good drainage matters. Mix in 2-3 inches of compost to improve fertility and structure. I like to work in 1 inch of compost per 6 inches of soil depth for balanced nutrition. Test your soil's pH if possible—most garden plants prefer 6.0-7.0. If your soil is too acidic or alkaline, add lime or sulfur as needed. For heavy clay soil, blend in 1 part sand per 3 parts soil to improve drainage. Let the amended soil settle for 1-2 weeks before planting. Spread 3-4 inches of organic mulch (wood chips, straw, or shredded leaves) over the entire area. This suppresses weeds, retains moisture, and regulates soil temperature. Leave a 2-inch gap around any existing plants or trees to prevent rot. For instant ground cover, plant creeping thyme, clover, or moss in sunny areas or sweet woodruff or ajuga for shade. These plants spread quickly, choking out weeds while adding beauty. Water deeply after planting to help them establish before the mulch takes over moisture retention. Choose drought-tolerant perennials and shrubs that thrive in your climate zone. Space plants according to their mature size—crowding leads to competition and poor growth. Water deeply once a week for the first month, then taper to every 2-3 weeks once established. Monitor for weeds in the first few months—pull them by hand before they spread. Once your plants fill in, mulch will naturally suppress most weeds. Fertilize lightly in spring with compost or slow-release granules to encourage strong growth without encouraging weeds.🌱 Step 3: Prepare the Soil for Planting
☀️ Step 4: Install Mulch and Ground Cover
💧 Step 5: Plant and Maintain Your New Garden
Tips & tricks for perfect low-maintenance garden transformation
Transforming your lawn into a garden isn't just about removing grass—it's about creating a space that thrives with minimal effort. Here are the key strategies I've learned from years of garden makeovers.
Layout Precision: When marking your garden area in Step 1, use a string line and stakes to create perfectly straight edges. This saves time later when installing mulch and prevents uneven planting beds. I always measure diagonally to ensure my paths are truly 4-foot wide—this small step makes a huge difference in how organized your garden feels.
Grass Removal Efficiency: For Step 2, rent a sod cutter if you have a large area—it's worth the investment. If you're smothering with cardboard, overlap sheets by 2 inches to prevent light from sneaking through. I've found that adding a thin layer of compost on top of the cardboard speeds up decomposition and gives you ready-to-plant soil in just 3-4 weeks instead of 6.
Soil Prep Secrets: In Step 3, don't skip the soil test—most garden centers offer free tests. I've seen soil pH as low as 5.0 that needed 5 pounds of lime per 100 square feet to reach the ideal 6.0-7.0 range. For clay soil, I blend in coarse sand (not fine beach sand) to improve drainage without compacting further. The 1-2 week settling period is crucial—this gives any added amendments time to integrate properly.
Mulch Application: When installing mulch in Step 4, use a rake to create a slight depression around plants before adding mulch. This prevents water from pooling against stems, which can cause rot. I've learned the hard way that leaving that 2-inch gap around trees is essential—too much mulch touching the trunk creates a perfect environment for pests and disease.
Pro Tips for Remove Lawn For Garden
- Transforming your lawn into a garden isn't just about removing grass—it's about creating a space that thrives with minimal effort.
- Layout Precision: When marking your garden area in Step 1, use a string line and stakes to create perfectly straight edges.
- Grass Removal Efficiency: For Step 2, rent a sod cutter if you have a large area—it's worth the investment.
Frequently asked questions
Got questions about ditching your lawn for a dream garden? Here are some common concerns—and straightforward answers—to help you get started with confidence!
When is the best time to remove my lawn for a garden?
The ideal time depends on your climate, but spring or early fall (when soil is workable and weeds are less aggressive) is best. Avoid extreme heat or frost—these conditions can stress plants and make removal harder. If you’re in a mild zone, late winter (before weeds sprout) works too!
How much does it cost to remove a lawn and replace it with a garden?
Costs vary widely: DIY removal (sod cutting, sheet mulching) can cost $0–$50 for materials, while hiring a pro for full excavation and hauling runs $1–$5 per sq. ft.. Factor in soil amendments (compost, mulch) and plants—start small to test your budget!
What’s the easiest way to remove lawn without chemicals?
Try sheet mulching (cardboard + compost) or solarization (clear plastic over moist soil for 4–6 weeks). For stubborn grass, smother it with thick layers of newspaper or burlap. Avoid tilling—it can spread grass roots and disrupt soil structure. Patience pays off!
Will removing my lawn attract pests like rats or insects?
Not necessarily! A well-planned garden with native plants, mulch, and proper drainage deters pests. Grass removal itself doesn’t cause infestations—poor maintenance (like rotting debris) might. Use organic pest control (neem oil, companion planting) to stay safe and eco-friendly.
How do I prepare my soil after removing the lawn?
Test your soil’s pH and nutrients, then amend with 2–4 inches of compost and a balanced fertilizer. Aerate compacted soil, and consider adding organic matter (leaf mold, worm castings) for structure. Avoid heavy tilling—it can harm soil microbes. Let nature do the work!
Can I still have a garden if my yard has shade?
Opt for shade-tolerant plants like hostas, ferns, or astilbes. Layer ground covers (like sweet woodruff) under taller plants to maximize space. Even lawn removal in shade improves drainage and reduces moss—just adjust your plant choices!
Wrapping up and next steps
Removing your lawn to create a garden isn’t just about saving time—it’s about crafting a space that nourishes your soul and the planet. 🌱 Whether you opt for native plants, drought-resistant shrubs, or a cozy veggie patch, every step brings you closer to a yard that thrives with less effort.
You’ve got the knowledge and tools now—what’s stopping you from diving in?
Start small if needed: replace a section of lawn this weekend, or sketch a dream garden layout today. Your future self (and the bees!) will thank you. Ready to turn that patch of green into a vibrant oasis? Grab your gloves and let’s grow! 🌿