
Lawn
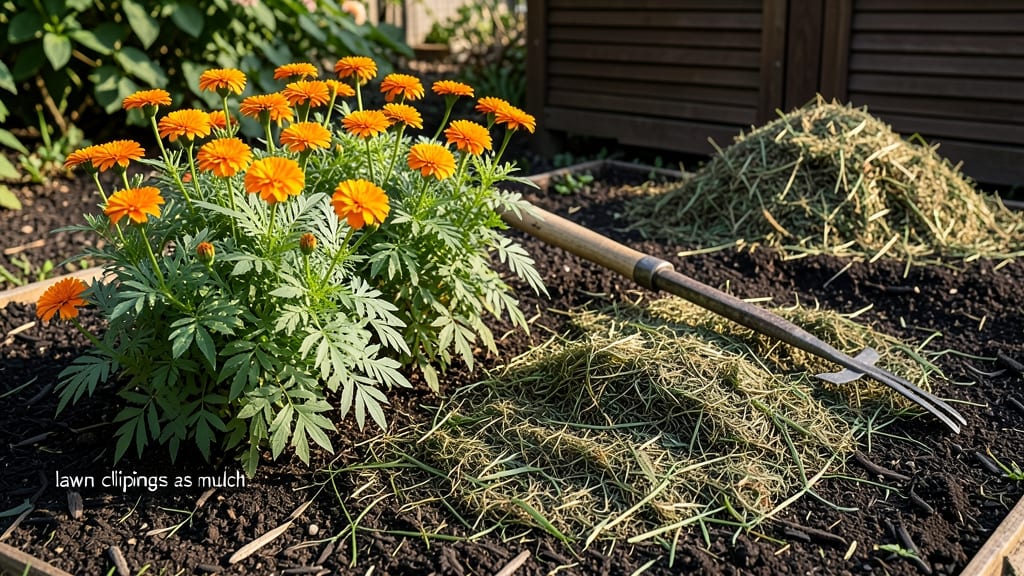
Using lawn clippings as mulch turns yard waste into a nutrient-rich soil booster that saves money and reduces landfill trash. ✨ I’ve cut my spring cleanup time in half by repurposing clippings instead of bagging them—what once felt like a chore now feeds my garden.
The process is simpler than you’d think, and the benefits (moisture retention, weed suppression, and free fertilizer) make it a no-brainer for any gardener.
First, let clippings dry for 24-48 hours to prevent matting and disease. Then, spread a 1-2 inch layer around plants, avoiding direct contact with stems to prevent rot. This method works for flower beds, vegetable patches, and even shrubs—just adjust thickness based on your soil’s needs.
The key is consistency: reapply every few weeks during growing season for best results.
Your garden will reward you with healthier soil and fewer weeds, all while cutting down on yard waste. The clippings break down slowly, feeding plants over time without the nitrogen spikes of fresh grass.
Plus, it’s a sustainable practice that keeps resources in your yard instead of a landfill. For best results, pair this with compost for a balanced soil boost.
If you’re dealing with disease-prone grass, like fungal-infected clover, skip mulching and compost those clippings instead. For small gardens, a simple rake and a weekend afternoon are all you need.
This technique works year-round, though fall applications are especially valuable for winter protection. Ready to turn your lawn waste into garden gold?
📚 In This Guide
- What you need
- Instructions
- Tips and common mistakes
- Wrapping up and next steps
What you need
- ● Fresh lawn clippings: At least 5–10 gallons (adjust based on garden size).
- ● Clippings should be dry but not wilted (avoid clumps or thick layers).
- ○ Optional: Mix with leaves, grass, or straw (20–30% of total volume) for texture and carbon balance.
- ● Tools: Garden rake or pitchfork – For spreading and mixing.
- ● Garden hose or watering can – To moisten clippings (lightly damp, not soggy).
- ● Garden gloves – Protect your hands from sharp grass edges.
- ○ Wheelbarrow or large bin – For transporting clippings (optional but helpful).
- ● Shovel or spade – For applying mulch evenly.
- ● Prerequisites: Dry, sunny day – Avoid working with wet clippings to prevent mold.
- ● Prepped garden bed – Remove weeds, rocks, or debris before applying.
- ● Patience (1–2 days for full breakdown) – Let mulch settle before watering.
- ○ Optional Enhancers (Boost Nutrients!): Compost or worm castings – 1 cup per 5 gallons of clippings for extra microbes.
- ● Wood ash (sparingly!) – ½ cup per 5 gallons to balance pH (use only if soil is acidic).
- ● Epsom salt – 1 tbsp per 5 gallons for magnesium-rich mulch.
Step-by-Step instructions for creating lawn clippings mulch
Here’s how to transform your grass clippings into a powerful, free soil booster that feeds your garden naturally.
🌱 Step 1: Collect Fresh, Dry Clippings
Gather clippings immediately after mowing while they’re still dry—wet clippings clump and mat down, making them unusable. I like to use a tarp or large cardboard box to collect them in one spot, shaking out the lawnmower bag if needed. Avoid clippings treated with herbicides, as these chemicals can harm plants and soil microbes.
Spread the clippings in a single layer on a flat surface, like a driveway or patio, to dry for 24-48 hours. You’ll know they’re ready when they crumble easily between your fingers and lose their fresh-cut smell. This drying process prevents matting and speeds up decomposition.
✂️ Step 2: Chop or Shred the Clippings
Use a string trimmer, sharp scissors, or even a lawnmower to chop the dried clippings into ½-inch to 1-inch pieces. Smaller pieces break down faster and blend more seamlessly into garden beds. I find a string trimmer works best for large batches—just run it over the clippings in quick passes to avoid creating dust.
If you’re short on time, leave them slightly larger (up to 1.5 inches). They’ll still decompose, just more slowly. The key is uniformity—uneven pieces can create uneven mulch layers, which may lead to patchy coverage in your garden.
🌿 Step 3: Mix with Garden Soil or Compost
Spread a 2- to 3-inch layer of the chopped clippings over garden beds, flower beds, or vegetable plots. For best results, mix them lightly into the top 1-2 inches of soil using a rake or hoe. This incorporates nitrogen and organic matter directly where roots can access it.
For a richer mulch blend, combine the clippings with equal parts compost or aged manure. This balances the high nitrogen content of grass clippings with phosphorus and potassium from compost. I like to layer them like lasagna—clippings first, then compost on top—so they decompose evenly over time.
💧 Step 4: Water and Monitor Decomposition
Water the mulched area lightly to help the clippings settle and begin breaking down. Overwatering can cause clumping, so aim for moist but not soggy soil. You’ll see the mulch darken within 3-5 days as it starts to transform into nutrient-rich humus.
Check the mulch layer every 2-3 weeks and add more if it decomposes too quickly. If it smells sour or attracts pests (like fungus gnats), it’s too wet—reduce watering and aerate the soil slightly. A properly balanced mulch should smell earthy, not sharp or rotten.
☀️ Step 5: Apply Seasonally for Long-Term Benefits
Use this mulch in early spring to feed hungry plants and in fall to protect soil over winter. In hot climates, apply it in late summer to retain moisture and cool roots. I apply a fresh layer every 4-6 weeks during growing seasons to keep soil fertile without overloading it.
The real magic happens over time—after 3-6 months, the mulch will have broken down into crumbly, dark organic matter that improves soil structure and holds moisture like a sponge. Your plants will thank you with stronger growth and fewer weeds.
Tips & tricks for perfect lawn clippings mulch
Transforming grass clippings into garden gold takes just a few smart moves—here's how to maximize every step.
Drying Strategy: For faster drying in Step 1, spread clippings on a surface with good airflow like a wire mesh screen or clean chicken wire. This allows air to circulate underneath and cuts drying time by nearly half compared to solid surfaces. If you're in a humid climate, consider using a fan to help evaporate moisture faster during the 24-48 hour drying period. The key is to get them completely dry—any moisture left will create clumps that won't break down properly.
Chopping Efficiency: In Step 2, work with the clippings when they're completely dry but still cool to the touch. Warm clippings can gum up your string trimmer or scissors, making the job harder. For large batches, divide the clippings into smaller piles and process them in stages. This keeps your tools working efficiently and prevents overheating. Remember, the goal is uniform pieces between ½-inch to 1-inch—this consistency ensures even decomposition throughout your garden beds.
Compost Layering: When mixing with soil in Step 3, create a "lasagna" effect by alternating layers of clippings and compost. Start with a 1-inch layer of clippings, then add ½-inch of compost, repeating until you reach your desired 2-3 inch total depth. This layering prevents matting and allows oxygen to reach all parts of the mulch, speeding up decomposition. The compost acts like a natural aerator, while the clippings provide the nitrogen boost your plants crave.
Seasonal Timing: Apply your mulch in Step 5 during the optimal window for your climate. In cooler regions, early spring application gives plants a nitrogen kick as they emerge, while fall applications protect soil through winter. In hot climates, late summer applications help retain moisture during peak heat. The 4-6 week reapplication schedule works best because it prevents overloading the soil with too much nitrogen at once, which can actually harm plants.
Pro Tips for Lawn Clippings For Mulch
- Transforming grass clippings into garden gold takes just a few smart moves—here's how to maximize every step.
- Drying Strategy: For faster drying in Step 1, spread clippings on a surface with good airflow like a wire mesh screen...
- Chopping Efficiency: In Step 2, work with the clippings when they're completely dry but still cool to the touch. Warm...
Frequently asked questions
Can I use lawn clippings as mulch right away?
Fresh clippings can work, but they’re best when slightly dried (1–2 days) to prevent matting and fungal growth. If your grass is disease-free, spread them thinly (¼-inch layer) and water lightly to help them decompose faster. For faster results, mix with a little compost or wood chips.
How long does it take for lawn clippings to break down?
Lawn clippings decompose quickly—usually within 2–4 weeks—if spread evenly (under ½-inch thick) and kept moist. Fine blades break down faster than thick, woody clumps. For speed, chop clippings shorter with a mulching mower or mix with other organic matter like leaves.
What should I avoid when using lawn clippings as mulch?
Avoid these common mistakes:
- Piling too thick (over 1 inch) can smother plants and create anaerobic conditions, leading to odors.
- Using clippings from chemically treated lawns—herbicides or fungicides can harm plants.
- Letting clippings accumulate in large piles (they’ll heat up and may burn plants).
- Skipping the drying step if your grass is damp or diseased.
Can I mix lawn clippings with other mulches?
Mixing clippings with wood chips, straw, or shredded leaves balances nitrogen (from clippings) with carbon (from other materials). A 2:1 ratio of carbon-rich mulch to clippings speeds decomposition and improves soil structure. Just avoid pairing with fresh manure—it can overheat the pile.
Will lawn clippings attract pests or rodents?
Clippings alone rarely attract pests, but thick, damp piles can invite fungi, slugs, or rodents if left undisturbed. To prevent issues:
- Spread clippings thinly and evenly.
- Avoid piling near structures or under dense foliage.
- Keep the area dry if pests are a concern in your area.
Wrapping up and next steps
Transforming your lawn clippings into a nutrient-rich mulch is a game-changer for your garden—saving you money, reducing waste, and boosting soil health in one easy step! 🌱 With just a few simple tools and a little patience, you’ve got a free, eco-friendly fertilizer ready to supercharge your plants.
Ready to give it a try?
Start small—grab your clippings, follow the recipe, and watch your garden thrive! Pro tip: Keep a dedicated bin or bag for clippings to streamline the process. Happy mulching!