
Lawn
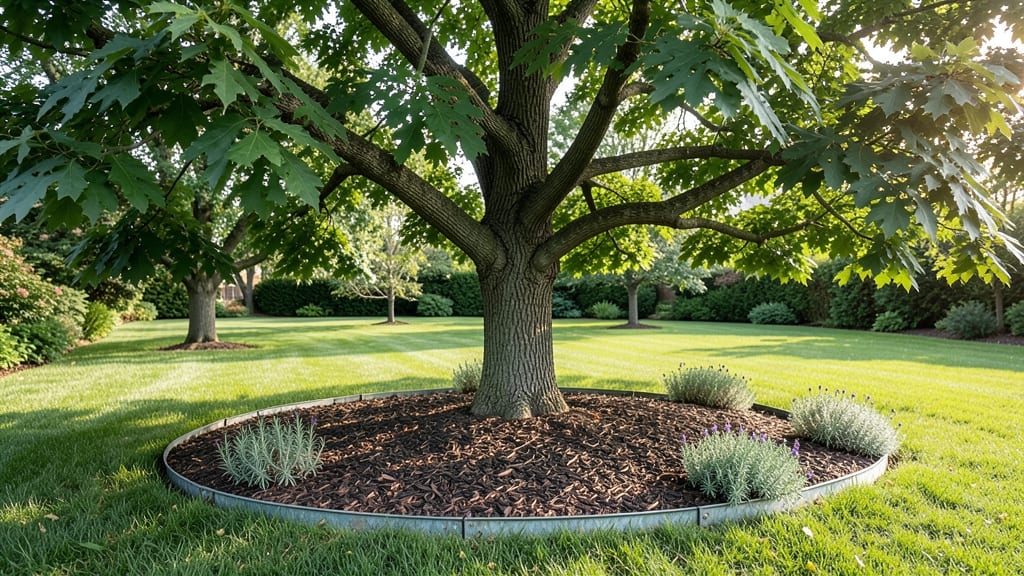
Creating a clean lawn around trees transforms your yard from cluttered to professionally landscaped. ✨ The key isn't just mowing close—it's edging with precision to protect roots while keeping grass sharp. I learned this the hard way when my first attempt left uneven borders that trapped weeds and damaged bark.
Start with a sharp edging tool (manual or electric) and work when soil is dry but not hard. Cut grass in a 45-degree angle along the tree trunk to prevent buildup that blocks water and air.
For young trees, leave a 2-3 inch gap between grass and trunk to avoid girdling. The payoff is immediate: a crisp, defined look that makes your yard look intentional. Over time, this method also reduces disease risk by improving airflow and sunlight exposure.
Even better, it takes just 30 minutes to edge a mature tree properly. For long-term health, pair edging with mulch (2-4 inches) around the base—just keep it 6 inches from the trunk. Avoid grass types that grow aggressively like Bermuda; opt for fine fescue or zoysia instead.
This combo keeps your lawn sharp and your trees thriving.
📚 In This Guide
- What you need
- Instructions
- Tips and common mistakes
- Wrapping up and next steps
What you need
- ● Edging Tool: A half-moon edger (for tight spaces) or a handheld vibrating edger (for precision).
- ● String Line or Garden Twine: 50–100 ft (for marking borders before edging).
- ● Stakes or Spikes: 10–20 small wooden or plastic stakes (to secure the string line).
- ● Measuring Tape: 25 ft (for accurate spacing around the tree trunk).
- ● Gloves & Knee Pads: Heavy-duty work gloves + knee pads (for comfort during edging).
- ● Pruners or Shears: Bypass pruners (to trim grass or weeds near the tree base).
- ● Rake or Leaf Blower: A stiff-bristle rake or leaf blower (to clear debris before edging).
- ● Edging Sand or Mulch: Coarse sand or mulch (to fill gaps for a polished finish).
- ● Tree Guard or Protective Barrier: Flexible plastic tree rings (to shield the trunk from edging tools).
- ● String Trimmer (Weed Whacker): For trimming grass in hard-to-reach areas after edging.
- ● Spray Bottle with Soap & Water: To clean tools post-project.
- ● Dry Weather: Avoid edging if the ground is wet or muddy (tools slip, and edges won’t be clean).
- ● Clear Workspace: Remove rocks, sticks, or debris within 2 ft of the tree.
- ● Tree Health Check: Ensure the tree is stable and healthy—no loose bark or signs of disease.
Precision techniques for edging lawn around trees
Here’s how to create clean, professional borders that protect tree roots and elevate your landscape’s polish.
🪴 Step 1: Mark the Edging Line with Precision
Use a spray paint or chalk line to outline the border 6-12 inches from the tree trunk, depending on the tree’s mature size. I like to measure from the dripline—the outermost branches—because that’s where roots spread aggressively. For small trees, stick to 6 inches; for mature oaks or maples, extend to 12 inches. This ensures the lawn doesn’t compete with the tree’s root zone.
Walk the line twice to verify it’s straight. If you’re edging around multiple trees, use a level or string line to maintain consistency. A crooked edge looks unprofessional and makes maintenance harder. For curved tree bases, follow the natural contour—never force sharp angles.
✂️ Step 2: Choose the Right Tool for the Job
For soft edges, a half-moon edger works best—it cuts cleanly through grass without disturbing tree roots. For hard materials like mulch or rocks, switch to a sharp shovel or edging spade. I always start with the edger to define the line, then refine with the shovel if needed. Avoid power tools near tree roots; their vibration can damage shallow feeder roots.
Angle the tool slightly toward the tree to create a gentle slope (about 15 degrees). This directs water runoff away from the trunk, preventing rot. If you’re edging into a mulch bed, press the tool just deep enough to slice through grass but not so deep it tears the root ball of nearby plants.
💧 Step 3: Remove Grass and Weeds Without Harming the Tree
Dig out grass and weeds in small sections, working from the tree outward. Use the flat side of your spade to lift soil and roots—never pull upward, which can uproot grass but leave stubborn rhizomes behind. For tough weeds like Bermuda grass, apply a spot herbicide (like glyphosate) 2-3 days before edging to weaken them. Avoid systemic herbicides near tree roots.
Discard the removed grass and weeds immediately—they’ll regrow if left near the edge. For organic removal, lay down cardboard or newspaper over the area, then top with 2-3 inches of mulch. This smothers weeds while breaking down naturally. Just ensure the cardboard touches the soil, not the tree trunk.
☀️ Step 4: Install a Protective Barrier (Optional but Recommended)
To keep grass from creeping back, install an edging barrier like plastic or metal edging strips along your marked line. Bury them 2-3 inches deep—deep enough to prevent grass from growing over the top but shallow enough to avoid damaging roots. For a natural look, use landscape fabric instead, tucking it 1 inch into the soil and overlapping seams by 6 inches.
This step is especially critical for trees with aggressive root systems (like willows or pines). Without a barrier, grass will encroach within 3-6 months, and your clean edges will vanish. I like to secure the barrier with landscape staples every 12 inches to keep it in place during watering or heavy rain.
🌿 Step 5: Finish with Mulch or Alternative Ground Cover
Top the edged area with 2-4 inches of mulch, keeping it 2-3 inches away from the tree trunk to prevent moisture buildup. Use wood chips, pine straw, or shredded bark—avoid dyed mulch, which can harm tree roots. For a polished look, rake the mulch smooth and create a slight crown around the tree base to direct water away.
If you’re using mulch in a dry climate, consider gravel or decomposed granite instead—it reduces moisture retention and prevents fungal growth. Replenish mulch annually, as it breaks down and loses its protective qualities. Over time, this method creates a professional, low-maintenance border that keeps your lawn and trees thriving.
Tips & tricks for perfect tree edging
These precision-focused techniques will help you achieve flawless, long-lasting borders that protect your trees while enhancing your landscape's appeal.
Precision Marking: For the most accurate edging line in Step 1, use a laser level or string line stretched between two stakes. This creates a perfectly straight reference line, especially important when edging around multiple trees. I've found that marking the line with chalk (instead of spray paint) allows you to make adjustments more easily—just wipe away and re-mark if needed. For curved tree bases, wrap the string line around the tree trunk to follow its natural contour.
Tool Technique: When using the half-moon edger in Step 2, maintain a consistent 45-degree angle to the ground. This creates a clean, professional edge that's both functional and visually appealing. For stubborn grass, press down firmly with your foot on the edger's handle to increase cutting pressure without straining. I've discovered that a serrated edge on your shovel prevents grass from regrowing along the edge—look for landscaping shovels specifically designed for edging.
Weed Prevention: In Step 3, after removing weeds, consider applying a pre-emergent herbicide to the freshly edged area. This prevents new weeds from sprouting for up to 3 months. For organic control, spread a thin layer of corn gluten meal (about 20 pounds per 1,000 square feet)—it's a natural pre-emergent that also provides slow-release nitrogen. The key is to apply it immediately after edging while the soil is disturbed, as this maximizes its effectiveness.
Barrier Installation: For the protective barrier in Step 4, I recommend using galvanized metal edging for maximum durability. It won't corrode over time like plastic alternatives. When installing, create a slight upward angle (about 5 degrees) on the side facing the lawn—this helps prevent grass from growing over the top. For large properties, consider using interlocking plastic edging which creates a seamless look and is easier to install around curves.
Pro Tips for Lawn Around Trees
- These precision-focused techniques will help you achieve flawless, long-lasting borders that protect your trees while...
- Precision Marking: For the most accurate edging line in Step 1, use a laser level or string line stretched between tw...
- Tool Technique: When using the half-moon edger in Step 2, maintain a consistent 45-degree angle to the ground. This c...
Frequently asked questions
Got questions about creating clean, professional borders around your trees? You're not alone! Here are some of the most common concerns—and straightforward answers—to help you tackle your lawn project with confidence.
What’s the best time of year to edge around trees?
Spring or early fall are ideal! Avoid winter (frozen ground) and summer (drought stress). Edging in spring lets you prep before weeds take over, while fall gives roots time to recover before winter. Just avoid heavy rain or extreme heat to keep the soil workable.
Will edging hurt my tree’s roots?
Not if done right! Stay at least 6–12 inches away from the tree trunk to avoid damaging shallow roots. Use a sharp edging tool (like a half-moon edger) to create clean lines without digging too deep. Always check for roots before cutting—when in doubt, go shallower!
What’s the difference between edging and mulching around trees?
Edging defines the border (like a sidewalk curb for your lawn), while mulching protects the tree (like a cozy blanket for roots). Use organic mulch (3–4 inches deep) after edging to retain moisture and suppress weeds. Skip inorganic mulch (like rocks) near trees—it traps heat and can harm roots.
How do I fix uneven or messy edges after edging?
Start by trimming straight lines with a string line for guidance. For stubborn lumps, use a hand tamper or gently rake the soil. If the edge is too deep, backfill with soil and compact lightly. Pro tip: A metal edging tool creates sharper lines than plastic—worth the upgrade!
Can I use a weed whacker instead of an edger?
Not for clean, professional results! Weed whackers can chop grass unevenly and may damage tree roots. For precision, invest in a half-moon edger (manual) or a string trimmer with an edging attachment (for larger areas). Your trees—and your lawn—will thank you!
Still stumped? Drop your specific challenge in the comments—we’re happy to help!
Wrapping up and next steps
Creating a polished lawn around trees doesn’t have to be a daunting task—it’s all about precision, patience, and the right tools! With the steps and tips shared here, you’ve got everything you need to achieve clean, professional borders that elevate your outdoor space. 🌳✨
Ready to take the next step? Grab your edging tools, roll up your sleeves, and transform your yard into a stunning, well-manicured oasis. Start small, stay consistent, and watch your hard work pay off in a lush, inviting landscape!