
Fertilization
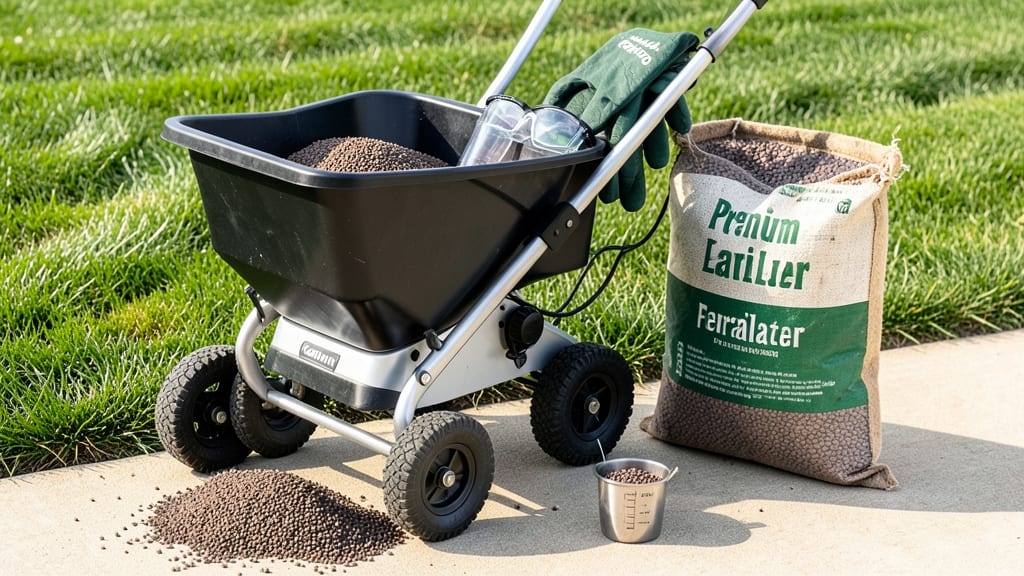
How to use a lawn fertilizer spreader turns patchy lawns into uniformly lush carpets—if you know the right technique. I’ve seen firsthand how a few extra minutes of calibration can mean the difference between a healthy lawn and one that looks like a science experiment gone wrong. The key isn’t just spreading; it’s spreading correctly—no clumps, no missed spots, and no wasted product.
Start by gathering your spreader, a measuring cup, and the fertilizer bag (check the label for application rates). Most spreaders need calibration: walk the length of your lawn, then adjust the settings so the spreader releases the recommended amount per 1,000 square feet.
Pro tip: wear a mask—those granules are finer than they look, and you don’t want them in your lungs. Safety first, always.
Once calibrated, work in overlapping 10-foot-wide strips, keeping a steady pace to avoid over- or under-applying. You’ll notice the difference immediately: no streaks, no bare patches, and a lawn that looks like it belongs in a postcard.
The payoff? Thicker grass, fewer weeds, and a yard that stays green even when your neighbors’ lawns turn brown by August.
This method works for broadcast spreaders and drop spreaders alike, whether you’re fertilizing a small suburban yard or a large acreage. Master this, and you’ll save money, time, and frustration—plus, your lawn will thank you with vibrant growth all season long. Ready to dial in the perfect spread?
📚 In This Guide
- What you need
- Instructions
- Tips and common mistakes
- Wrapping up and next steps
What you need
- ● Lawn fertilizer spreader: Broadcast spreader (for granular fertilizer) – choose between hand-pushed or tow-behind models
- ● Drop spreader (for precise, even coverage) – ideal for small to medium lawns
- ● Fertilizer: Granular lawn fertilizer (e.g., slow-release or quick-dissolve) – check NPK ratio (e.g., 24-0-10) for your grass type
- ● Quantity: Follow package instructions (typically 10–50 lbs per 1,000 sq ft, depending on spreader settings)
- ● Protective gear: Gloves (nitrile or leather) – to avoid skin irritation from fertilizer
- ● Safety goggles – for dusty conditions
- ● Long sleeves/pants – to shield against windblown granules
- ● Measuring tools: Measuring cup or scale – for calibrating spreader settings
- ● Tape measure or wheel marker – to map out sections of your lawn
- ● Water source: Garden hose with nozzle – for post-application watering (if required by fertilizer type)
- ● Calibration kit (e.g., tray or catch pan) – for fine-tuning spreader output
- ● Windbreaks (e.g., cardboard or flags) – to prevent drift on windy days
- ● Lawn edging tool – to create clean borders and avoid over-fertilizing flower beds
- ● Spreader wheel cover – to protect your lawn from wear and tear
- ● Notebook or app (e.g., lawn care tracker) – to log fertilizer dates and types
Step-by-step instructions for using a lawn fertilizer spreader
Mastering even coverage takes practice, but these precision techniques will transform your lawn care routine.
Calibrate the Spreader for Your Lawn Size
Begin by measuring your lawn's square footage using a tape measure and calculator. For example, a 50-foot by 30-foot yard equals 1,500 square feet. Most fertilizer bags list application rates per 1,000 square feet—here's where precision pays off. Set the spreader's output rate according to the manufacturer's instructions, typically using the 1,000-square-foot coverage rate as your baseline.
I always double-check by weighing a small sample of fertilizer after spreading it over a measured area. Place a tarp under the spreader and walk a 10-foot by 10-foot section, then weigh the collected fertilizer. Adjust the spreader's setting until you achieve the correct pounds per 1,000 square feet specified on the bag. This ensures you're not over- or under-applying, which wastes product and money.
Prepare the Lawn and Equipment
Mow the lawn to a uniform height before spreading—no taller than 3 inches—to ensure even contact between fertilizer and grass blades. Remove any debris, toys, or obstacles from the yard, as these create uneven coverage patterns. For broadcast spreaders, set the wheels to their widest position to maximize coverage per pass, while drop spreaders should have the wheels adjusted to overlap slightly between rows.
Fill the spreader with the recommended amount of fertilizer, typically half to two-thirds full for most models. Wear gloves and a dust mask, especially with granular fertilizers, as the particles can irritate skin and lungs. I always shake the bag thoroughly before pouring to distribute any settled granules evenly. This prevents clumping in the spreader, which leads to streaks in your lawn.
Spread Fertilizer in Overlapping Passes
Start at one corner of the lawn and work in straight, parallel lines, leaving a 2-foot overlap between each pass. For drop spreaders, walk slowly—about 3 miles per hour—to ensure consistent distribution. Broadcast spreaders require a slightly faster pace, but still deliberate, to avoid missing spots. Pay special attention to edges and tight spaces, like along fences or flower beds, where the spreader may not reach as effectively.
Watch for visual cues: the lawn should develop a uniform, even color as you spread. If you see darker or lighter stripes, you're either moving too fast or too slow. I recommend practicing on a small, inconspicuous area first to dial in your speed and technique. This step is critical—uneven application leads to patchy growth and wasted fertilizer.
Clean and Store the Spreader Properly
After finishing, empty any remaining fertilizer from the spreader into the bag, then clean the hopper and wheels with a stiff brush to remove residue. Rinse the spreader with water if it's designed for that purpose, or wipe it down with a damp cloth. Leftover fertilizer can harden and clog the mechanism, making future use difficult. Store the spreader in a dry place, like a garage or shed, to prevent rust and degradation.
I also take a moment to inspect the spreader for wear and tear, like cracked wheels or worn-out parts. Addressing these issues early saves time and frustration later. Proper maintenance extends the life of your spreader and ensures it performs reliably for years. This final step might seem minor, but it’s what keeps your equipment ready for the next application.
Water the Lawn Immediately After Spreading
Water the lawn lightly but thoroughly within 24 hours of applying fertilizer to activate the nutrients. Use a sprinkler or hose to deliver ¼ to ½ inch of water, enough to moisten the soil without causing runoff. This step is non-negotiable—fertilizer needs moisture to dissolve and penetrate the soil, where the grass roots can absorb it.
Timing matters here: if you wait too long, the fertilizer may bake into the soil or wash away before the grass can use it. I set a reminder on my phone to water after spreading, especially on hot or windy days when evaporation is higher. The goal is to see the water soak into the soil, not pool on the surface. This final watering ensures your lawn gets the full benefit of the fertilizer you’ve carefully applied.
Tips & tricks for perfect lawn fertilizer application
Precision is everything when it comes to lawn care, and these pro techniques will help you avoid common pitfalls while achieving flawless coverage every time.
Calibration is Key: The 1,000-square-foot baseline measurement is your best friend, but don't stop there. I've found that testing on a 10x10-foot section with a tarp underneath reveals the true accuracy of your spreader's settings. This simple step often shows discrepancies between the manufacturer's claims and real-world performance—especially with older models. For example, my broadcast spreader was actually delivering 15% more fertilizer than the setting suggested, which would have wasted product if I hadn't caught it.
Visual Cues Matter More Than Speed: Forget trying to time your walking speed—focus on the visual result. In Step 3, you're looking for that uniform, even color across the lawn. If you see darker stripes, you're moving too slowly and over-applying. Lighter stripes mean you're moving too fast and under-applying. I recommend marking a 10-foot section with spray paint first to practice your speed before covering the entire lawn. This visual approach works better than trying to maintain an exact walking pace, which varies based on your stride length and spreader type.
Edge Management Strategy: The most common mistake I see is rushing through edges and tight spaces. In Step 3, when you reach fences, flower beds, or other obstacles, I suggest working in small, deliberate passes rather than trying to cover everything in one motion. For drop spreaders, consider using the "hand spread" technique—turn off the spreader and manually distribute fertilizer along edges with your gloved hand. This extra attention prevents the telltale uneven patches that ruin an otherwise perfect job.
Post-Application Inspection: Before you water, do a quick visual sweep of your lawn. Look for any missed spots or areas where fertilizer has piled up. In Step 4, when cleaning your spreader, take an extra minute to inspect the wheels and hopper for any residual granules that might have fallen during application. I've caught multiple missed spots this way, especially after working around obstacles. This final check ensures you're not leaving your lawn vulnerable to patchy growth or wasted product.
Pro Tips for Use A Lawn Fertilizer Spreader
- Precision is everything when it comes to lawn care, and these pro techniques will help you avoid common pitfalls while achieving flawless coverage every time.
- Calibration is Key: The 1,000-square-foot baseline measurement is your best friend, but don't stop there.
- Visual Cues Matter More Than Speed: Forget trying to time your walking speed—focus on the visual result.
Frequently asked questions
Got questions about using a lawn fertilizer spreader? You’re not alone! Here are answers to the most common concerns—from timing to troubleshooting—to help you spread like a pro.
When is the best time to fertilize my lawn?
The ideal time depends on your grass type and climate, but early spring (as growth resumes) and late summer/early fall (for cool-season grasses) are prime windows. Avoid fertilizing during droughts or extreme heat—wait until soil is moist for best absorption. Check your fertilizer’s label for specific recommendations!
How do I calibrate my spreader for even coverage?
Start by measuring a small, square area (e.g., 10’ x 10’) and spread fertilizer at the manufacturer’s recommended rate. Weigh the output (use a kitchen scale) and adjust the spreader’s settings until you hit the target. For example, if 1 lb covers 1,000 sq ft, aim for 0.1 lbs per 100 sq ft in your test area.
Can I use a broadcast spreader for seeds or mulch?
Broadcast spreaders work for lightweight materials like grass seed or straw mulch, but they’re not ideal for heavy or clumpy substances (e.g., topsoil or pellets). For seeds, reduce the spreader’s speed and overlap passes slightly to ensure even distribution. A drop spreader is better for precision with seeds or granular soil amendments.
Why is my spreader clogging or jamming?
Clogs usually happen with damp or lumpy fertilizer. Break up clumps before loading, and never store fertilizer in the spreader—always empty it after use. If it still jams, check the auger blades for debris and lubricate moving parts lightly with silicone spray (avoid oil!). A 10-15 minute shake can also dislodge stubborn blockages.
What’s the difference between a drop spreader and a broadcast spreader?
| Drop Spreader | Broadcast Spreader |
|---|---|
| Drops fertilizer directly below the spreader for precise, overlapping coverage. | Scatters fertilizer in a wide arc, covering larger areas faster. |
| Best for small lawns, edges, or high-precision applications (e.g., seeds). | Ideal for large, open areas where speed matters. |
| Less waste (no over-spray). | May require multiple passes for even coverage. |
Pro Tip:
Always wear a dust mask and gloves when handling fertilizer—even "organic" types can irritate skin or lungs. And if you’re spreading near sidewalks or driveways, use a push broom to sweep up overage afterward!
Wrapping up and next steps
Mastering your lawn fertilizer spreader is the first step to a lush, vibrant lawn—and you’ve got this! 🌱 By following these precision techniques, you’ll ensure even coverage, avoid waste, and keep your grass thriving season after season.
Now that you’re equipped with the know-how, grab your spreader and get started—your lawn’s transformation begins with just one pass!
Need to go further? Check out our guide on choosing the right fertilizer for your grass type to maximize results!