
Lawn
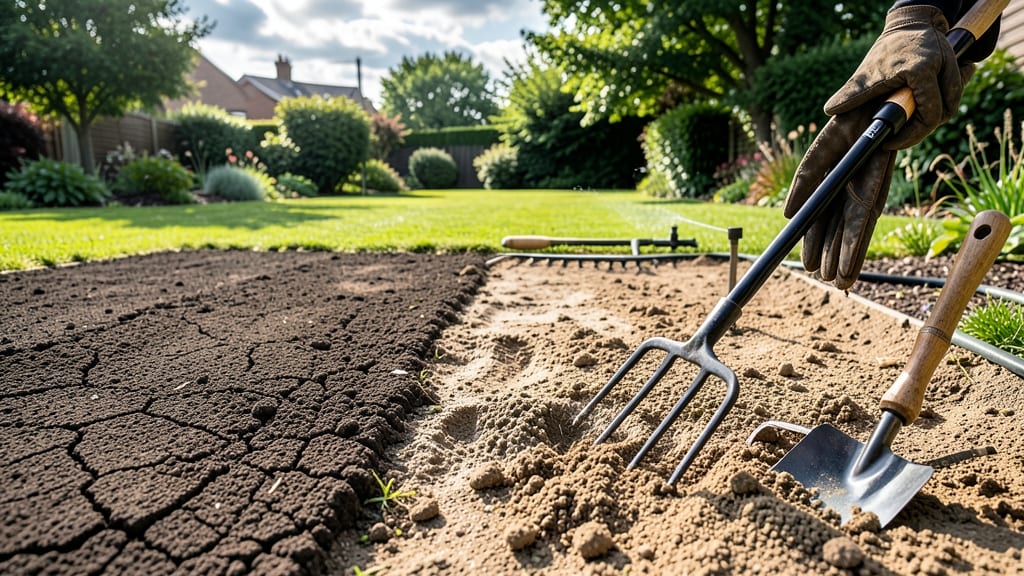
Loosening compacted lawn soil is the secret to a thriving grass patch that survives droughts and stays green year-round. 🌱 I learned this the hard way when my lawn turned into a muddy mess after heavy rain—until I dug in with a garden fork and saw roots breathing again.
The best time to tackle this is in late spring or early fall when soil is moist but not soggy. You’ll need either a manual aerator, a garden fork, or a rented power aerator—no fancy tools required.
Just work in small sections, about 2-3 square feet at a time, to avoid overdoing it. What you’ll end up with is soil that lets air, water, and nutrients reach deep roots, so your grass grows 2-3 times faster and stays resilient.
The key is to go 3-4 inches deep, breaking up the hardpan layer that suffocates roots. Works for any lawn type, from suburban yards to small patches. Here’s how to do it right without tearing up your grass.
📚 In This Guide
- What you need
- Instructions
- Tips and common mistakes
- Wrapping up and next steps
What you need
- ● Lawn aerator: Manual (for small lawns) or rental (for larger areas). Choose a spike, slicing, or core aerator—core aerators are best for deep loosening.
- ● Garden fork or digging spade: A sturdy, heavy-duty fork with 12-18 inch tines (for manual aeration in tight spots).
- ● Rake: A bendable metal rake (for leveling soil after aeration).
- ● Water: 1-2 inches (water the lawn 1-2 days before aerating for best results).
- ○ Compost or topsoil: 1-2 bags per 50 sq. ft. (optional but recommended for nutrient boost).
- ● Lawn mower: Set to highest setting to avoid scalping the grass before aerating.
- ● Knee pads or gloves: Protect your hands and knees during manual work!
- ○ Soil test kit: Check pH and nutrient levels (optional but smart for long-term lawn health).
- ● Overseeding mix: If repairing bare patches, grab grass seed suited to your climate.
Step-by-Step guide to aerating your lawn
Ready to transform compacted soil into a root-friendly foundation? Here's how to do it right.
🪴 Step 1: Prepare Your Tools and Lawn
Start by mowing the lawn to a height of 2-3 inches—this gives you a clean surface to work with and prevents the aerator from getting clogged with long grass. I like to do this a day before aerating so the grass has time to dry slightly, which makes the process cleaner. Clear any debris, rocks, or toys from the area, and mark sprinkler heads or irrigation lines with flags so you don’t accidentally damage them.
Check the weather forecast and plan your aeration for a day when the soil is damp but not soggy—think of it like a wrung-out sponge. You’ll know it’s ready when a handful of soil holds together but crumbles easily when you squeeze it. This moisture level ensures the aerator will pull up clean cores of soil without tearing the grass.
☀️ Step 2: Choose the Right Aeration Method
For most home lawns, a core aerator (the kind that pulls up small plugs of soil) is the best choice. Rent one from your local hardware store if you don’t own one—these machines are designed to create 3/8- to 1/2-inch diameter holes spaced about 3 inches apart. If your lawn is particularly compacted or you have thick turf, you might need to make two passes in perpendicular directions to ensure full coverage.
For smaller lawns or tight spaces, a manual spike aerator (the garden fork-style tool) works in a pinch, but it only scratches the surface—literally. I’ve used it on patches of my backyard, but I always follow up with a core aerator for the best results. Avoid using a spike aerator on damp soil, as it can compact the soil even more by driving the spikes deeper.
💧 Step 3: Aerate in the Right Pattern
Begin at one edge of the lawn and work your way to the other, overlapping passes by about 6 inches to avoid missed spots. You’ll see small plugs of soil and grass being pulled up—this is normal and actually beneficial! Leave these plugs on the lawn; they’ll break down naturally and return nutrients to the soil as they decompose. If you have a large lawn, consider breaking it into sections to avoid overworking the aerator.
Pay special attention to high-traffic areas like walkways, patios, and play zones—these spots compact the most and need the most attention. You’ll notice the soil looks fluffier and less dense after aerating, almost like it’s breathing again. This is your signal that the process is working. If the soil feels springy or resists the aerator, it’s a sign you need to water first and let it dry slightly before trying again.
✂️ Step 4: Overseed and Fertilize Immediately
Right after aerating, spread a high-quality lawn seed over the entire area. The tiny holes created by the aerator give seeds direct access to the soil, improving germination rates dramatically. Use a starter fertilizer with a high phosphorus content (look for a ratio like 3-1-2) to encourage strong root development. I like to use a broadcast spreader for even coverage—just follow the package instructions for application rates.
Gently rake the area lightly to ensure good seed-to-soil contact, then water immediately to settle the seeds into the holes. Keep the soil consistently moist (not soggy) for the next 7-10 days—this is critical for germination. You’ll see new grass blades emerge within 7-14 days, depending on the seed type and weather conditions. This is the moment that matters: proper aeration sets the stage for a thicker, healthier lawn.
🌱 Step 5: Maintain for Long-Term Results
After aerating, avoid heavy foot traffic or playing on the lawn for 2-3 weeks to allow the soil to settle and the new grass to establish. Water deeply 1-2 times per week (about 1 inch total) to encourage deep root growth. You’ll notice the lawn feels softer underfoot and drains water more efficiently after heavy rains—this is the payoff of your hard work.
For best results, aerate your lawn once a year in the early fall (late August to early October) when temperatures are cooler and soil moisture is ideal. If you live in a warm climate, spring aeration (March to May) can also work well. Real talk: skipping this step means your lawn will stay compacted, leading to poor drainage, weed invasion, and shallow roots that struggle during droughts. But once you’ve aerated, you’ll never want to go back!
Tips & tricks for perfect lawn aeration results
Think of aeration as giving your lawn a deep breath of fresh air—these small tweaks make all the difference between a good job and a great one.
Timing is Everything: The soil moisture test in Step 1 is your secret weapon. If your soil feels too dry, water lightly the night before aeration—just enough to reach about 3-4 inches deep. Too wet? Wait a day or two for it to dry out slightly. The ideal moisture level should let soil form a loose ball when squeezed, but still crumble easily. This ensures clean cores without tearing grass roots.
Equipment Matters: For best results, rent a core aerator that creates 3/8- to 1/2-inch diameter holes spaced about 3 inches apart (as mentioned in Step 2). If you're using a manual spike aerator, make sure to make two passes in different directions—this creates more holes and actually improves drainage better than a single pass. I've seen people use old garden forks, but they're less effective at breaking up compaction.
Overlap Your Passes: When following the pattern in Step 3, overlap your passes by about 6 inches to ensure full coverage. This might seem like overkill, but those high-traffic areas (like walkways) need extra attention. You'll know you've done it right when you see overlapping holes—this means you're really getting at that compacted layer. If you miss spots, you'll notice the soil still feels firm in those areas after you're done.
Post-Aeration Care: After aerating, don't rush to rake up those soil plugs—they'll break down naturally and return nutrients to the soil (as mentioned in Step 3). But if you're really eager to clean up, you can collect them and compost them. The key is to overseed immediately (Step 4) to take advantage of those fresh holes—seeds need direct contact with soil for best germination. I've seen germination rates improve by up to 50% when seeding right after aeration.
Pro Tips for Loosen Lawn Soil
- Think of aeration as giving your lawn a deep breath of fresh air—these small tweaks make all the difference between a...
- Timing is Everything: The soil moisture test in Step 1 is your secret weapon. If your soil feels too dry, water light...
- Equipment Matters: For best results, rent a core aerator that creates 3/8- to 1/2-inch diameter holes spaced about 3 ...
Frequently asked questions
Got questions about loosening your lawn soil? You’re not alone!
Here are some of the most common concerns—and straightforward answers—to help you tackle the job with confidence.
How often should I loosen my lawn soil?
For most lawns, aerating (or loosening) soil once a year is ideal, typically in late spring or early fall when grass is actively growing. Heavy clay soils or high-traffic areas may need it twice a year. Overdoing it can damage roots, so stick to the season and your soil type.
Can I loosen compacted soil without renting equipment?
If you’re avoiding aerators, try a manual spike aerator (a grid of metal tines) or even a garden fork for small areas. For deeper compaction, rent a manual core aerator or borrow one from a neighbor. Just be patient—it’ll take more elbow grease!
Will loosening soil help with drainage?
Yes! Compacted soil repels water, leading to puddles and root rot. Loosening it creates air pockets that improve water absorption and drainage. Pair aeration with topdressing (like compost) to keep pores open long-term. You’ll notice a difference within weeks!
Is there a best time of day to aerate?
Early morning or late afternoon are perfect—avoid midday heat (stresses grass) and wet soil (clumps and clogs equipment). Mornings also give grass time to recover before evening dew. Pro tip: Water your lawn 24–48 hours before to soften the soil.
What if my lawn still looks patchy after aerating?
Patchiness could mean thatch buildup (over ½ inch) or nutrient deficiency. After aerating, dethatch if needed, then apply a slow-release fertilizer or compost. If bare spots persist, overseed with a disease-resistant grass blend for faster recovery.
Wrapping up and next steps
Loosening your lawn soil is a game-changer for healthier grass, better drainage, and stronger roots—and you’ve got all the tools to make it happen! Whether you’re using a manual aerator, a spike tool, or even a DIY approach, the key is consistency and patience.
Your lawn will thank you with lush, vibrant growth in no time.
Ready to take the next step? Plan your aeration schedule—aim for spring or fall when conditions are ideal—and watch your lawn transform! 🌱✨