
Lawn
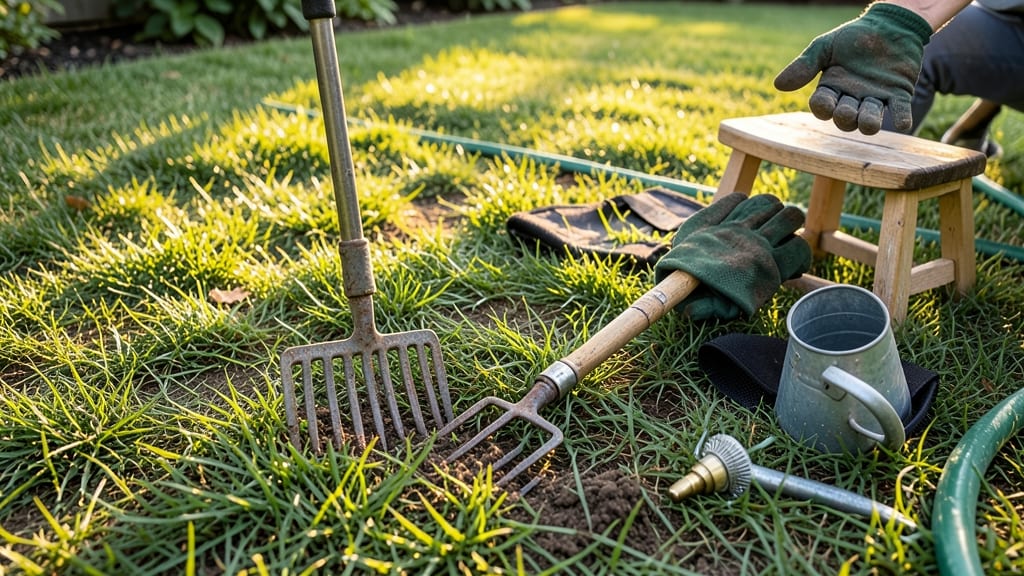
Aerating your lawn by hand transforms that compacted soil into a sponge for water and nutrients. 🌱 I’ve spent years fighting dense grass with nothing but a fork and elbow grease—here’s how to do it right without renting expensive machines.
The payoff? Roots grow deeper, water soaks in instead of pooling, and your lawn finally feels soft underfoot after just one session.
You only need two tools: a garden fork (the kind with sturdy tines) and aerator spikes (or even a pair of sturdy shoes if you’re desperate). Work on a cool, damp day when the soil is soft—not too wet, or you’ll make mud.
Start at one end of your lawn and push the fork down 4-6 inches at a 90-degree angle, wiggling it gently to loosen the soil without tearing roots. Repeat in a grid pattern, about 3-4 inches apart.
After aerating, you’ll see plugs of soil pop up—don’t toss them! Leave them on the lawn to break down naturally and return nutrients. Water lightly afterward, and within 2-3 weeks, you’ll notice grass growing thicker and greener.
The best part? This method costs less than $20 and works for small lawns, patches, or even container gardens. No machinery, no fuss—just better soil.
For larger areas, a mechanical aerator saves time, but hand aerating gives you more control over depth and spacing. Do this once a year in early fall or spring, and your lawn will thank you for years.
The effort feels worth it the first time you walk across grass that doesn’t feel like stepping on a trampoline.
📚 In This Guide
- What you need
- Instructions
- Tips and common mistakes
- Wrapping up and next steps
What you need
- ● Hand aerator spikes (aerator sandals or spike shoes): 1–2 pairs (for comfort and efficiency)
- ● Look for stainless steel or carbon steel spikes, 3–6 inches long
- ○ Optional: Adjustable spikes for varying soil depths
- ● Garden fork or digging fork: 1 sturdy, 4-tined fork (12–18 inches long)
- ● Look for heavy-duty, rust-resistant materials
- ● Knee pads or gardening gloves: 1 pair of cushioned knee pads (for comfort)
- ● 1 pair of durable gardening gloves (to protect hands)
- ● Rake (bow or leaf rake): 1 medium-tooth rake (for clearing debris)
- ● Watering can or hose: 1 lightweight watering can (for spot-watering) or a hose with a gentle spray nozzle
- ● Soil aeration spikes (manual, non-sandal type): 1–2 long-handled spikes (for deeper soil penetration)
- ● Lawn roller (lightweight): 1 small, manual roller (to firm soil post-aeration)
- ● Compost or topsoil: Small bag (for filling holes after aeration)
- ● Lawn fertilizer (slow-release): 1 bag (to nourish roots post-aeration)
Step-by-step guide to hand-aerating a dense lawn
Skip the rental fees and heavy equipment—this manual method works just as well for small to medium lawns.
🪴 Step 1: Prep the Lawn and Gather Tools
Start on a damp but not soggy day—soil should hold together when squeezed but not crumble. I like to water lightly the evening before to soften compacted areas without making them muddy. Clear the lawn of debris, rocks, and toys, then mark any sprinkler heads or utility lines with flags so you don’t accidentally damage them.
Grab your garden fork (the kind with tines spaced 1-2 inches apart) and a hose with a gentle spray nozzle. Wear sturdy shoes—you’ll be walking all over the lawn. I also keep a small rake nearby to smooth things out after aerating. Work in a systematic pattern, like rows or sections, to avoid missing spots.
🌱 Step 2: Puncture the Soil in a Grid Pattern
Insert the fork about 3-4 inches deep into the soil at a 45-degree angle. Press down firmly until the tines hit resistance—this breaks up the compacted layer. Pull the fork straight up, leaving a 2-3 inch deep hole. Space each puncture 3-4 inches apart in a grid to ensure thorough aeration without overlapping too much.
Focus on high-traffic areas first where the soil feels hardest. You’ll know you’re hitting the right depth when the tines meet resistance about halfway down—the compacted layer. If the soil feels loose at the surface, you may need to go slightly deeper. Work in small sections to keep from tiring out before finishing.
💧 Step 3: Water and Top-Dress After Aerating
Once you’ve covered the entire lawn, water deeply to help the soil settle around the aeration holes. This encourages roots to grow deeper into the loosened areas. I like to use a slow, deep watering—about ½ inch of water—to avoid washing away soil or disturbing the newly aerated zones.
After watering, spread a ¼-inch layer of compost or topsoil over the lawn using a broadcast spreader or by hand. This adds organic matter to the newly loosened soil and helps seeds or grass roots establish more easily. Lightly rake the top-dressing into the holes to blend it in, but don’t pack it down—you want it to settle naturally.
⏰ Step 4: Monitor and Maintain for Best Results
Keep the lawn lightly watered for the next 7-10 days to encourage root growth into the aerated soil. You’ll see the most improvement in 2-3 weeks as grass recovers and soil structure improves. Avoid heavy foot traffic or mowing for at least 48 hours to let the soil stabilize.
For best long-term results, aerate by hand once a year in early fall or spring when grass is actively growing. If your lawn is severely compacted, repeat the process in 6-8 weeks to break up deeper layers. Over time, this method will give you a healthier, more resilient lawn without the hassle of machinery.
Tips & tricks for perfect hand-lawn aeration
Common pitfalls—and how to sidestep every one. This method works beautifully, but a few small adjustments can make all the difference between a good job and a great one.
Tool Selection: Not all garden forks work equally well. Look for one with tines spaced 1-2 inches apart—this spacing matches the ideal aeration hole size perfectly. I've found that a sturdy, heavy-duty fork with a comfortable grip makes the job significantly easier, especially after 20 minutes of work. The right tool prevents hand fatigue and ensures consistent depth.
Soil Consistency Check: The instructions mention damp-but-not-soggy soil, but here's what that really means: when you squeeze a handful, it should hold together but not leave a mess on your hand. I've learned this the hard way—working dry soil makes it nearly impossible to create proper holes, while soggy soil clumps and resists the fork. Test a few spots before starting to adjust your watering accordingly.
Systematic Approach: Working in rows or sections isn't just about organization—it's about efficiency. I like to start at one corner and work my way systematically across the lawn. This prevents you from missing spots (which happens more often than you'd think) and helps you track progress. For larger lawns, consider dividing it into quadrants to make the process more manageable.
Post-Aeration Care: The 48-hour waiting period before mowing is crucial, but don't just set it and forget it. Lightly water for 7-10 days to encourage root growth into the newly loosened soil. I've noticed that grass recovers faster when you maintain this consistent moisture—think of it like giving your lawn a drink after surgery. The key is gentle, frequent watering rather than deep soakings.
Pro Tips for Aerate A Lawn By Hand
- Common pitfalls—and how to sidestep every one. This method works beautifully, but a few small adjustments can make al...
- Tool Selection: Not all garden forks work equally well. Look for one with tines spaced 1-2 inches apart—this spacing ...
- Soil Consistency Check: The instructions mention damp-but-not-soggy soil, but here's what that really means: when you...
Frequently asked questions
Got questions about hand-aerating your lawn? You’re not alone—this method takes patience and know-how! Here are answers to the most common queries to help you tackle the job like a pro.
How often should I aerate my lawn by hand?
For most lawns, aerate once a year in early fall (September–October) when grass is actively growing but before winter dormancy. If your soil is extremely compacted (like clay-heavy areas), you can do it twice—once in spring and once in fall. Focus on high-traffic zones first!
How long does it take to aerate a lawn by hand?
Hand-aerating is a slow process! For a 1,000 sq. ft. lawn, expect to spend 2–4 hours, depending on soil density and tool efficiency. Break it into sessions if needed—your back (and lawn) will thank you. Pro tip: Work in small sections (5’x5’) to avoid fatigue.
Can I use a garden fork instead of a hand aerator?
A penetrating garden fork (or even a sturdy shovel) works in a pinch. Drive it 6–8 inches deep at 3–4 inch intervals, then wiggle it side-to-side to loosen soil. Just be prepared for more arm work—wear gloves and take breaks! For large areas, a spike aerator shoe can speed things up.
What’s the best weather to hand-aerate?
Aim for a cool, overcast day when soil is moist but not soggy (like after a light rain). Avoid aerating in dry or frozen ground—it’ll compact further. If your lawn is bone-dry, water it 24–48 hours before aerating. Think of it like prepping dough: just the right consistency!
Will aerating by hand bring up grubs or weeds?
Yes, but don’t panic! Hand-aerating disturbs the topsoil, which may expose grubs, weeds, or even buried trash. Use this as a chance to remove debris and apply pre-emergent herbicide (if needed) right after. For grubs, consider beneficial nematodes afterward to protect your lawn.
Bonus Tip:
After aerating, top-dress with compost or a thin layer of sand to fill holes and improve soil. This step seals the deal for healthier roots!
Wrapping up and next steps
Aerating your lawn by hand is a rewarding way to improve soil health and root growth without heavy machinery! 🌱 With the right tools, patience, and technique, you’ll see a noticeable difference in your grass’s vibrancy and resilience.
Start small, stay consistent, and soon your lawn will thank you with lush, aerated soil ready for seeds or fertilizer.
Now that you’re armed with the know-how, take action! Pick a calm day, grab your tools, and give your lawn the TLC it deserves. Happy aerating! 🌿