
Lawn
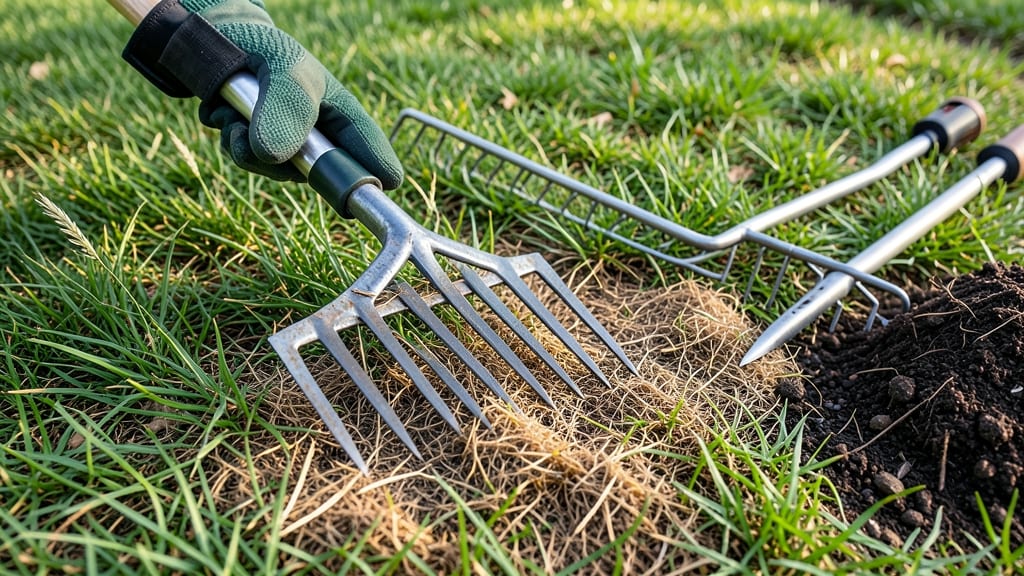
The best way to dethatch your lawn starts with the right technique—precision matters more than brute force. ✂️ I’ve seen thick thatch layers choke out grass, even with regular mowing, and the solution isn’t just pulling out a rake.
It’s about timing, tool selection, and knowing when to stop before you damage the roots beneath. A manual dethatching rake or a power rake cuts through thatch layers (¼ inch or thicker) without scalping the soil.
Late spring or early fall is ideal—when grass is actively growing but not stressed by heat or drought. The goal is to remove just enough thatch to let air, water, and nutrients reach the roots, not tear up the lawn. After dethatching, your grass will look rough, but that’s normal.
Follow up with aeration to open soil pores, overseeding to fill bare spots, and a light fertilizer to help recovery. You’ll see lush, even growth in about 4-6 weeks if you’ve removed the right amount of thatch.
Avoid common mistakes like dethatching dry grass or going too deep—both invite weeds and stress the lawn. And never skip the post-care steps; they’re what turn a rough patch into a thriving, healthy lawn.
📚 In This Guide
- What you need
- Instructions
- Tips and common mistakes
- Wrapping up and next steps
What you need
- ● Dethatching Rake (Manual): A bow rake with stiff metal tines (3–4 inches long) or a thatch rake designed for this task.
- ● Quantity: 1 (or 2 if working on a large lawn).
- ○ Dethatching Machine (Optional but Recommended for Large Lawns): A manual or electric dethatcher (e.g., Scarifier) with adjustable blades.
- ● Specifications: Look for one with removable blades and depth adjustment (¼–½ inch).
- ● Quantity: 1 (rental options available for occasional use).
- ● Garden Gloves: Heavy-duty, cut-resistant gloves (e.g., leather or reinforced fabric).
- ● Quantity: 1 pair.
- ○ Lawn Mower (Optional but Helpful): A mower with adjustable height set to 1–1.5 inches for post-dethatching.
- ● Compost or Topsoil: 2–3 cubic yards (for patching bare spots or overseeding).
- ○ Lawn Seed (Optional): 10–20 lbs (match seed type to your grass variety).
- ● Rake (Garden Rake): Bow rake with flexible tines for spreading compost or seed.
- ● Water Hose with Nozzle: Adjustable nozzle for rinsing debris post-dethatching.
- ● Wheelbarrow or Tarp: For collecting and disposing of thatch/debris.
- ○ Knee Pads (Optional): Comfort item for long sessions!
Step-by-Step instructions for dethatching a lawn
Here's the method I trust to safely remove thatch without tearing up your grass—perfect for a healthy lawn.
🪴 Step 1: Check Thatch Thickness and Weather Conditions
First, grab a small trowel and slice a 2-inch deep section of turf. If the thatch layer (the spongy material between soil and grass blades) measures ½ inch or thicker, it's time to dethatch. Do this on a cool, overcast day when temperatures are between 50-75°F—hot sun dries grass too fast, and cold soil makes cleanup harder.
I always test a small patch first. If the grass springs back quickly when you step on it, it's ready. If it stays flattened, wait a week or two—dethatching stressed grass just invites disease. Mow the lawn first to 2-2.5 inches to reduce strain on the blades during the process.
✂️ Step 2: Select the Right Tools for Your Lawn Size
For small lawns under 1,000 square feet, a manual dethatching rake with ½-inch tines works best. I like the kind with a stiff handle and angled teeth—they cut through thatch without ripping roots. For larger areas, a power dethatcher with adjustable depth (set to ½ inch max) saves time, but only use it on healthy grass.
Never use a regular garden rake—its tines are too wide and will tear grass. If your lawn has thick thatch, rent a vertical mower first to loosen it before raking. This two-step method prevents scalping and gives you cleaner results. Always wear gloves; thatch debris can irritate skin.
💧 Step 3: Dethatch in Sections with Controlled Pressure
Start at one end of the lawn and work in 2-foot wide strips, raking parallel to the grass blades. Push the rake forward with steady pressure—too light and you'll leave thatch behind; too hard and you'll scalp the turf. You'll know you're doing it right when you see thin ribbons of thatch lift away but the grass crowns (the white base where blades meet soil) remain intact.
Stop every 10 feet to check your depth. If you see bare soil or torn roots, you've gone too deep. Water the lawn lightly before starting if the soil feels dry—moisture helps the rake glide smoothly. For stubborn thatch, go over the same area once more, but this time rake perpendicular to the first pass to catch any missed spots.
☀️ Step 4: Clean Up and Recover the Lawn
After dethatching, rake up all debris with a leaf rake to prevent it from smothering the grass. I spread the collected thatch evenly over garden beds as mulch—it breaks down nicely over time. Then, water the lawn deeply to help roots re-establish contact with the soil. You'll see grass blades perk up within 24-48 hours if the roots weren't damaged.
Wait 3-5 days before fertilizing—dethatching exposes roots, and fresh fertilizer can burn them. Instead, apply a light layer of compost to help soil microbes recover. If you notice brown patches after dethatching, they're likely from torn roots, not dead grass. These should green up once the roots regenerate with proper care.
⏰ Step 5: Schedule Maintenance for Long-Term Results
Dethatch again next year if thatch builds up faster than ½ inch annually. Healthy lawns only need dethatching every 2-3 years, but high-traffic areas or cool-season grasses (like fescue) may need it yearly. Mow regularly at the right height to prevent thatch buildup—3-4 inches for most grasses—and aerate in fall to keep soil porous.
Real talk: Dethatching feels like a lot of work, but skipping it leads to compacted soil, poor water absorption, and weak grass. I promise, the first time you see your lawn drink up water like a sponge after dethatching, you'll never go back. Just take it slow, and your grass will thank you.
Tips & tricks for perfect lawn dethatching
A few simple adjustments can make all the difference between a frustrating lawn project and a smooth, professional-looking result.
Tool Selection Tip: If you're using a manual dethatching rake, look for one with ½-inch tines that are angled—this is exactly what the instructions specify for cutting through thatch without damaging grass crowns. I've found that rakes with spring-loaded handles give you better control over pressure, which is crucial when working in those 2-foot wide strips mentioned in Step 3. For larger lawns, consider renting a power dethatcher with adjustable depth set to ½ inch max—just be gentle with cool-season grasses as they're more delicate.
Weather and Timing Secret: The 50-75°F temperature range in Step 1 isn't just about comfort—it's about giving your grass the best chance to recover. On cooler days, soil moisture stays higher, which helps the rake glide more smoothly and reduces the risk of tearing roots. If you must work in hotter conditions, do it in the early morning when dew is present. And remember: the 24-48 hour recovery window after dethatching is when your grass is most vulnerable to heat stress, so keep it watered lightly during this period.
Pressure Control Breakthrough: The key to avoiding scalped turf is maintaining consistent pressure throughout your 2-foot wide strips. Here's how I test it: after every 10 feet, lift the rake and check for thin ribbons of thatch lifting away while the grass crowns remain intact. If you see bare soil, you've gone too deep. Pro tip: grip the rake handle with both hands—one to pull and one to push—this gives you better control over the pressure than using just one hand. For stubborn thatch, that second perpendicular pass really works wonders.
Post-Dethatching Recovery: That 3-5 day wait before fertilizing is non-negotiable—exposed roots are like open wounds. Instead of fertilizer, apply a ¼-inch layer of compost immediately after cleaning up debris. This helps soil microbes recover and provides gentle nutrients without burning. I've noticed that lawns treated this way show 24-48 hour recovery much more consistently than those fertilized too soon. For brown patches that appear, don't panic—they're usually torn roots regenerating, not dead grass.
Pro Tips for Best Way To Dethatch A Lawn
- A few simple adjustments can make all the difference between a frustrating lawn project and a smooth, professional-lo...
- Tool Selection Tip: If you're using a manual dethatching rake, look for one with ½-inch tines that are angled—this is...
- Weather and Timing Secret: The 50-75°F temperature range in Step 1 isn't just about comfort—it's about giving your gr...
Frequently asked questions
Got questions about dethatching your lawn? You’re not alone!
Here are answers to the most common concerns—so you can tackle thatch like a pro without the guesswork.
When is the best time to dethatch my lawn?
The ideal window is early spring or fall when grass is actively growing but not under stress. Avoid summer heat or winter dormancy—both can slow recovery. For cool-season grasses (like fescue or bluegrass), aim for late August to early October or March to May. Warm-season grasses (like Bermuda or Zoysia) thrive with dethatching in May to June.
Can I dethatch a wet lawn?
Nope! Wait until the soil is dry—even slightly damp is better than soggy. Wet thatch clumps together, clogs your rake, and can smother your grass roots. Test it: If a handful of soil crumbles easily, you’re good to go. Pro tip: Water lightly 24 hours before dethatching to soften the thatch layer without oversaturating.
What’s the difference between a dethatching rake and a regular lawn rake?
A dethatching rake (or "thatchet") has stiffer, wider tines (3–4 inches apart) designed to penetrate and lift thatch, while a standard rake has flexible tines for debris removal. Skip the garden rake—it’ll just tear grass blades. For small lawns, a manual thatchet works; larger areas need a power dethatcher (rental or electric) for efficiency.
My lawn looks patchy after dethatching—what went wrong?
Patchiness usually means too-aggressive dethatching or thinning grass. Here’s how to fix it:
- Scalp depth: Never remove more than ½ inch of thatch—deeper cuts expose roots.
- Overlap passes: Work in one direction only to avoid tearing grass.
- Reseed/fertilize: Spread grass seed and a starter fertilizer within 48 hours to speed recovery.
Do I need to dethatch every year?
Not necessarily! Only dethatch if thatch builds up to ½ inch or thicker. Healthy lawns with proper mowing (3–4 inches high), aeration, and fertilization rarely need it yearly. Signs you’re due: Spongy feel, water pooling, or pests/diseases creeping in. For most lawns, every 2–3 years is plenty—just stay vigilant.
Wrapping up and next steps
Dethatching your lawn doesn’t have to be a daunting task—with the right tools and technique, you can achieve a thatch-free, vibrant lawn in no time! 🌱 Whether you choose a manual rake, a power dethatcher, or a vertical mower, consistency and precision are key.
Start small, work methodically, and don’t forget to overseed and fertilize afterward to give your grass a strong, healthy foundation.
Now that you’re armed with the best practices, roll up your sleeves and get to work! Your lawn will thank you with lush, green growth. Ready to see the results? Check out our guide on post-dethatching care to keep your yard looking its best year-round.