
Lawn
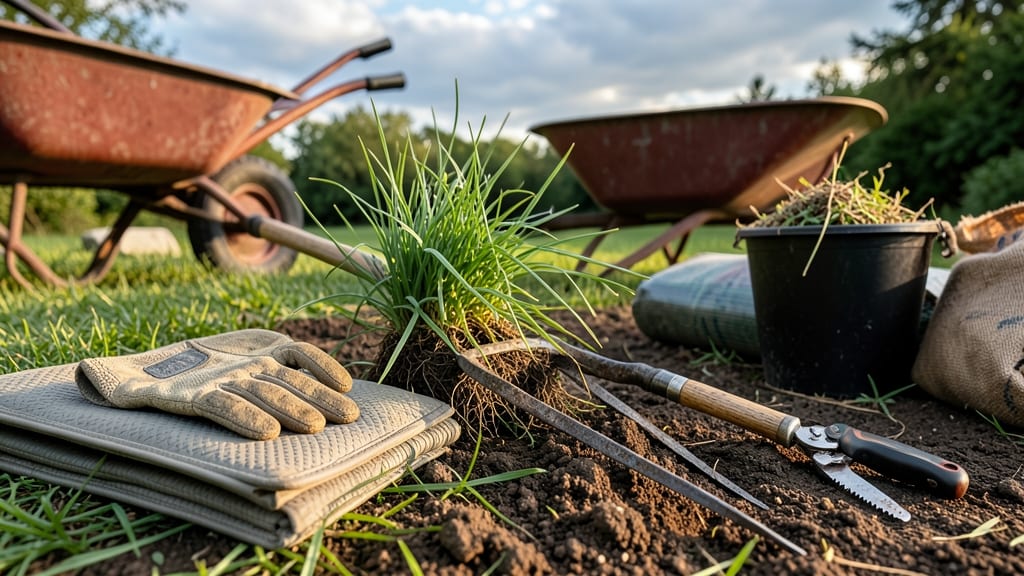
Removing lawn by hand saves your back and leaves the soil intact for new planting. ✂️ I’ve spent years perfecting this no-kneel method—no more sore knees or wasted energy.
The key is working in small sections, leveraging dry soil, and using the right tools to lift grass cleanly without tearing up the roots beneath.
You’ll need a sturdy digging bar, heavy-duty gloves, a tarp for debris, and a sharp spade for stubborn patches. Timing matters too: tackle this on a dry, sunny day when the grass is brittle.
Start by slicing through the sod in 12-inch strips, then pry it up in layers, keeping the soil structure intact for your next project.
The payoff is immediate: no herbicide residue, no waiting for chemicals to break down, and a clean slate ready for gardens, patios, or ground covers. Even stubborn roots give way with patience—just work slowly and angle the bar to avoid gouging the soil.
By the end, you’ll have a smooth, weed-free surface with minimal effort.
For follow-up, loosen the top 4-6 inches of soil with a broadfork to improve drainage, then amend with compost if planting flowers or vegetables. This method works year-round but is easiest in late summer or early fall when grass is dormant. Ready to transform your yard without the mess?
📚 In This Guide
- What you need
- Instructions
- Tips and common mistakes
- Wrapping up and next steps
What you need
- ● Heavy-duty gardening gloves (2 pairs) – Opt for nitrile-coated or leather for grip and protection.
- ● Sharp-handled shovel or spade (1) – A flat-edged or digging spade (16–18 inches long) works best.
- ● Pruners or loppers (1 pair) – For trimming stubborn roots or thick grass clumps.
- ● Wheelbarrow or large tarp (1) – To haul away grass clippings and debris (2–3 cubic feet capacity recommended).
- ● Rake (bow or leaf rake) (1) – A sturdy metal-tined rake helps loosen soil and gather roots.
- ○ Knee pads or a small stool (optional but helpful) – Reduces strain for longer sessions.
- ● Water hose or bucket (1) – For rinsing tools and wetting stubborn patches (if needed).
- ● Trash bags (heavy-duty, 30+ gallon) (2–3 bags) – For disposing of grass and debris.
- ● Soil knife or dandelion digger – For precision removal of deep roots.
- ● Broadcast spreader (for mulch/compost) – If you plan to reuse the soil.
- ● Work vest or tool belt – Keeps essentials handy and hands free.
- ● Earplugs (if in a noisy area) – Protects hearing from power tools nearby.
- ● Sunscreen & hat – Because no-kneel doesn’t mean no sun exposure!
Step-by-Step instructions for hand-lawn removal without the backache
Skip the heavy machinery and get down to the roots—literally—with this efficient, low-impact method.
🪴 Step 1: Gather Your Tools and Prep the Area
Start with a handheld sod cutter or sharp spade—these let you slice cleanly without straining. I always wear knee pads (even if you’re not kneeling) to protect joints during long sessions. Mark your work zones with stakes and string to avoid overcutting or missing spots. This keeps you organized and prevents exhaustion from retracing steps.
Clear debris like rocks and sticks first—they’ll jam your tools and slow you down. Work in 4-foot squares for manageable sections. If your lawn has thick roots, consider renting a manual sod cutter for the edges before switching to hand tools. The goal is to remove entire sod strips in one pull, not dig patchwork holes.
✂️ Step 2: Cut and Lift Sod Strips Efficiently
Slice the sod with your spade at a 45-degree angle, about 2-3 inches deep. This angle lets you pry up the entire strip later without tearing. Work in straight lines, spacing cuts 6-8 inches apart—this prevents the sod from breaking into awkward chunks. I like to start at the perimeter and work inward, using the string lines as guides.
Once you’ve cut a strip, grip the sod with both hands near the cut edge and lift straight up—don’t wiggle or twist, or you’ll leave root fragments behind. Lay the sod aside in whole sheets (don’t stack—it smothers grass underneath). If a strip resists, wiggle the spade slightly to loosen it before pulling. The deeper the initial cut, the easier the lift.
🌱 Step 3: Remove Remaining Roots and Soil
After pulling the sod, use a hand rake to loosen the remaining soil and roots. Focus on the top 2-3 inches—this is where most grass roots live. I rake in a zigzag pattern, scraping toward the center of the cleared area. This prevents roots from curling back into the soil, which can regrow into a stubborn thatch layer.
For stubborn roots, use a garden fork to pry them out. Insert the fork at a 45-degree angle, leveraging upward to break the root system. Avoid digging deep—you’re not tilling, just removing grass. If you hit compacted soil, a few fork jabs will aerate it enough for your next project. The goal here is to leave no grass fragments behind.
💧 Step 4: Prep the Bare Soil for Your Next Project
Once the area is clear, rake the soil smooth to remove any remaining debris. This is your chance to assess the ground—if it’s rocky or uneven, now’s the time to amend it. For new plantings, loosen the top 4 inches with a fork to improve drainage. If you’re laying down mulch or new sod, make sure the surface is level to prevent water pooling.
I like to water the area lightly after clearing—this helps settle the soil and makes it easier to work with later. If you’re planting immediately, add 2-3 inches of compost and mix it into the top layer. This feeds your new plants right away and prevents weed seeds from germinating. The key is to leave the soil loose, level, and ready for whatever comes next.
⏰ Step 5: Clean Up and Maintain Your Tools
Sharpen your spade and rake immediately after use—dried grass gunk dulls blades faster than you’d think. A quick wipe-down with a hose or damp cloth removes sap and prevents rust. Store tools in a dry place, and oil any metal parts if you’ll be working in humid conditions. I keep a small bucket nearby to collect debris for composting—nothing goes to waste.
Finally, take a step back and admire your progress. Hand-removal might seem slow, but it’s the only way to guarantee a clean slate without chemical residues or machinery damage. Cover the cleared area with cardboard or landscape fabric if you’re not planting right away—this blocks light and prevents grass regrowth while you decide your next move.
Tips & tricks for hand-lawn removal without the backache
Real talk: Hand-removing lawns is all about technique—not brute force. These small adjustments will save your back, speed up the process, and leave you with a cleaner workspace.
Tool Angle Matters: In Step 2, when slicing sod at a 45-degree angle, think of it like cutting a cake—you want the blade to glide under the grass cleanly. I've found that using a sharp spade (not a dull one!) makes all the difference. If your cuts feel labored, you're either using the wrong angle or your tool needs sharpening. A quick test: If you can't slice through sod with minimal pressure, it's time to sharpen or swap tools.
The 4-Foot Square Strategy: Working in 4-foot squares (as mentioned in Step 1) isn't just about organization—it's about pacing. I've learned to take a 5-minute break every time I finish a square. This prevents fatigue and keeps your cuts consistent. Pro tip: Use your stakes and string as a visual guide to maintain straight lines, which makes lifting sod strips easier later.
Root Removal Rescue: If you encounter stubborn roots in Step 3, don't force it. Instead, use the garden fork at a 45-degree angle and gently rock it back and forth. This breaks the root system without compacting the soil. I've ruined perfectly good soil by digging too aggressively—don't make my mistake! Focus on the top 2-3 inches, where most roots live, and you'll save time and effort.
Post-Clearing Prep: After clearing, don't skip the light watering in Step 4. This settles the soil and reveals any hidden debris. I've found that adding 2-3 inches of compost right away (if planting) creates the perfect foundation. The soil should feel loose and crumbly—like a well-prepared garden bed—not compacted or rocky.
Pro Tips for Remove Lawn By Hand
- Real talk: Hand-removing lawns is all about technique—not brute force. These small adjustments will save your back, s...
- Tool Angle Matters: In Step 2, when slicing sod at a 45-degree angle, think of it like cutting a cake—you want the bl...
- The 4-Foot Square Strategy: Working in 4-foot squares (as mentioned in Step 1) isn't just about organization—it's abo...
Frequently asked questions
Got questions about removing lawn by hand? You’re not alone! Here are some of the most common concerns—and straightforward answers—to help you tackle the job with confidence.
How long does it take to remove a lawn by hand?
Timing depends on lawn size and teamwork. A small yard (500 sq. ft.) can take 2–4 hours for one person, while larger areas may require a full day or weekend. Work in sections, and don’t rush—precision beats speed! Pro tip: Schedule this on a cool, cloudy day to avoid overheating.
Do I need to rent or buy tools for this?
You can rent a sod cutter ($50–$100/day) or buy tools like a sod bar ($30–$80) or pry bar ($15–$30) if you plan to DIY long-term. For one-time projects, renting saves money. Hand tools (shovel, wheelbarrow) are essential—don’t skip them!
What’s the best way to dispose of the removed lawn?
Options vary by location:
- Municipal pickup: Check if your city offers free yard waste removal (call ahead!).
- Composting: Shred the sod and mix with browns (leaves, straw) to avoid matting.
- Landfill: Last resort—call your local waste facility for rules (some charge fees).
Will removing the lawn damage my soil?
Not if done right! Hand-removal exposes soil, which can actually improve drainage and reduce compaction. Just:
- Avoid heavy machinery (like tractors) afterward.
- Add 2–3 inches of compost post-removal to restore nutrients.
Can I remove just part of my lawn?
Spot-removing lawn is perfect for garden beds, patios, or native plant areas. Use a string trimmer or hand saw to outline sections, then dig up the sod in small patches. Pro tip: Mark boundaries with spray paint first to stay neat!
What if weeds keep growing after removal?
Weeds are stubborn but manageable! After removal:
- Solarize: Cover bare soil with clear plastic for 4–6 weeks to kill weeds.
- Mulch: Apply cardboard + mulch to smother regrowth.
- Hand-pull: Target weeds early—they’re easier to remove when small.
Wrapping up and next steps
Removing lawn by hand may seem like a labor of love, but with the right tools and technique, you’ll transform your space into something fresh, functional, and free of grass. 🌱 Whether you’re clearing a patch for a garden, patio, or fire pit, this no-kneel method saves your back while delivering satisfying results.
Now that you’re armed with knowledge, roll up those sleeves and get started—your dream project awaits!
Next step: Sketch a rough layout of your new space (or dig in!) and tackle one section at a time. Progress over perfection!